Primex Finance is a cross-chain liquidity protocol that supports margin trading across multiple decentralized exchanges (DEXs). Currently the platform has launched Beta version on Ethereum Goerli Testnet and will also operate on zkSync - a potential Layer2 of Ethereum soon. So don't miss this opportunity, let's try the testnet of Primex for more opportunities to be retroactive in the future.
Property Faucet
Step 1:
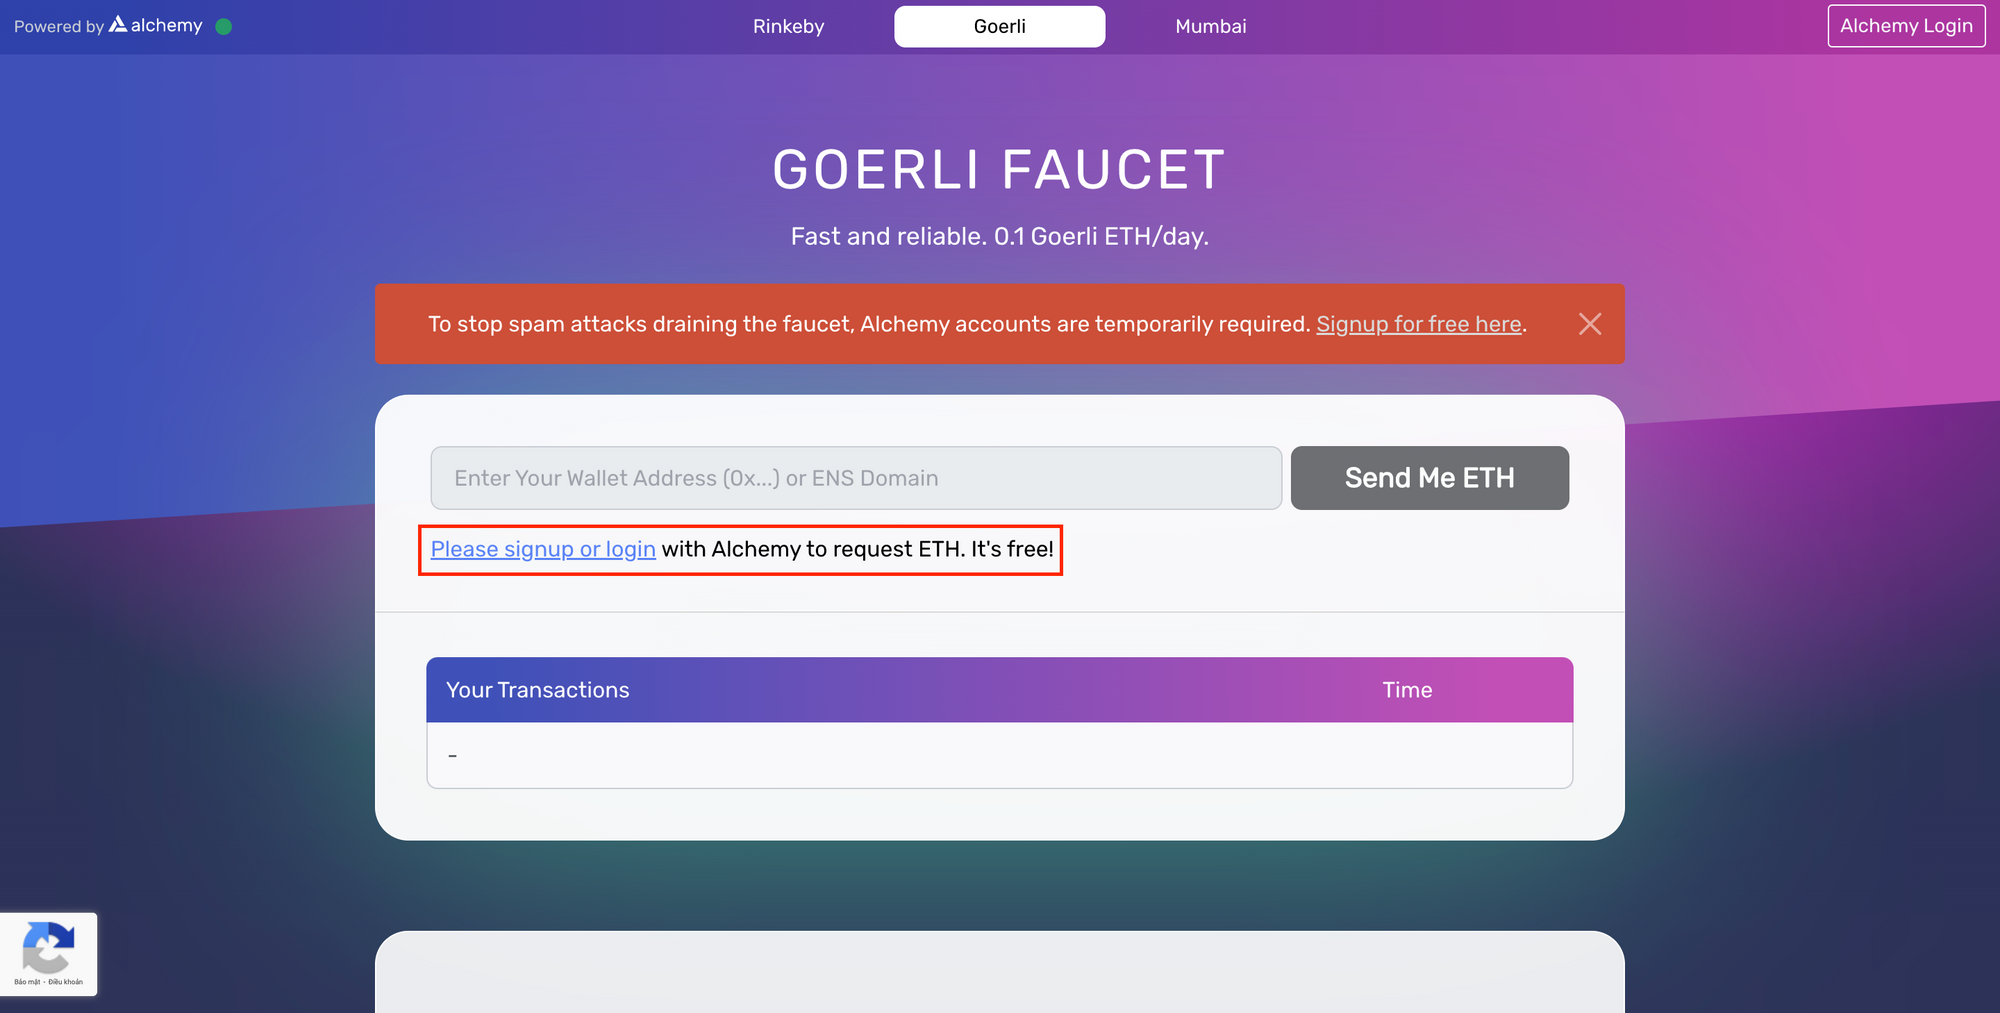
Go to Goerli Faucet , log in or register for an Alchemy account to continue.
Step 2:
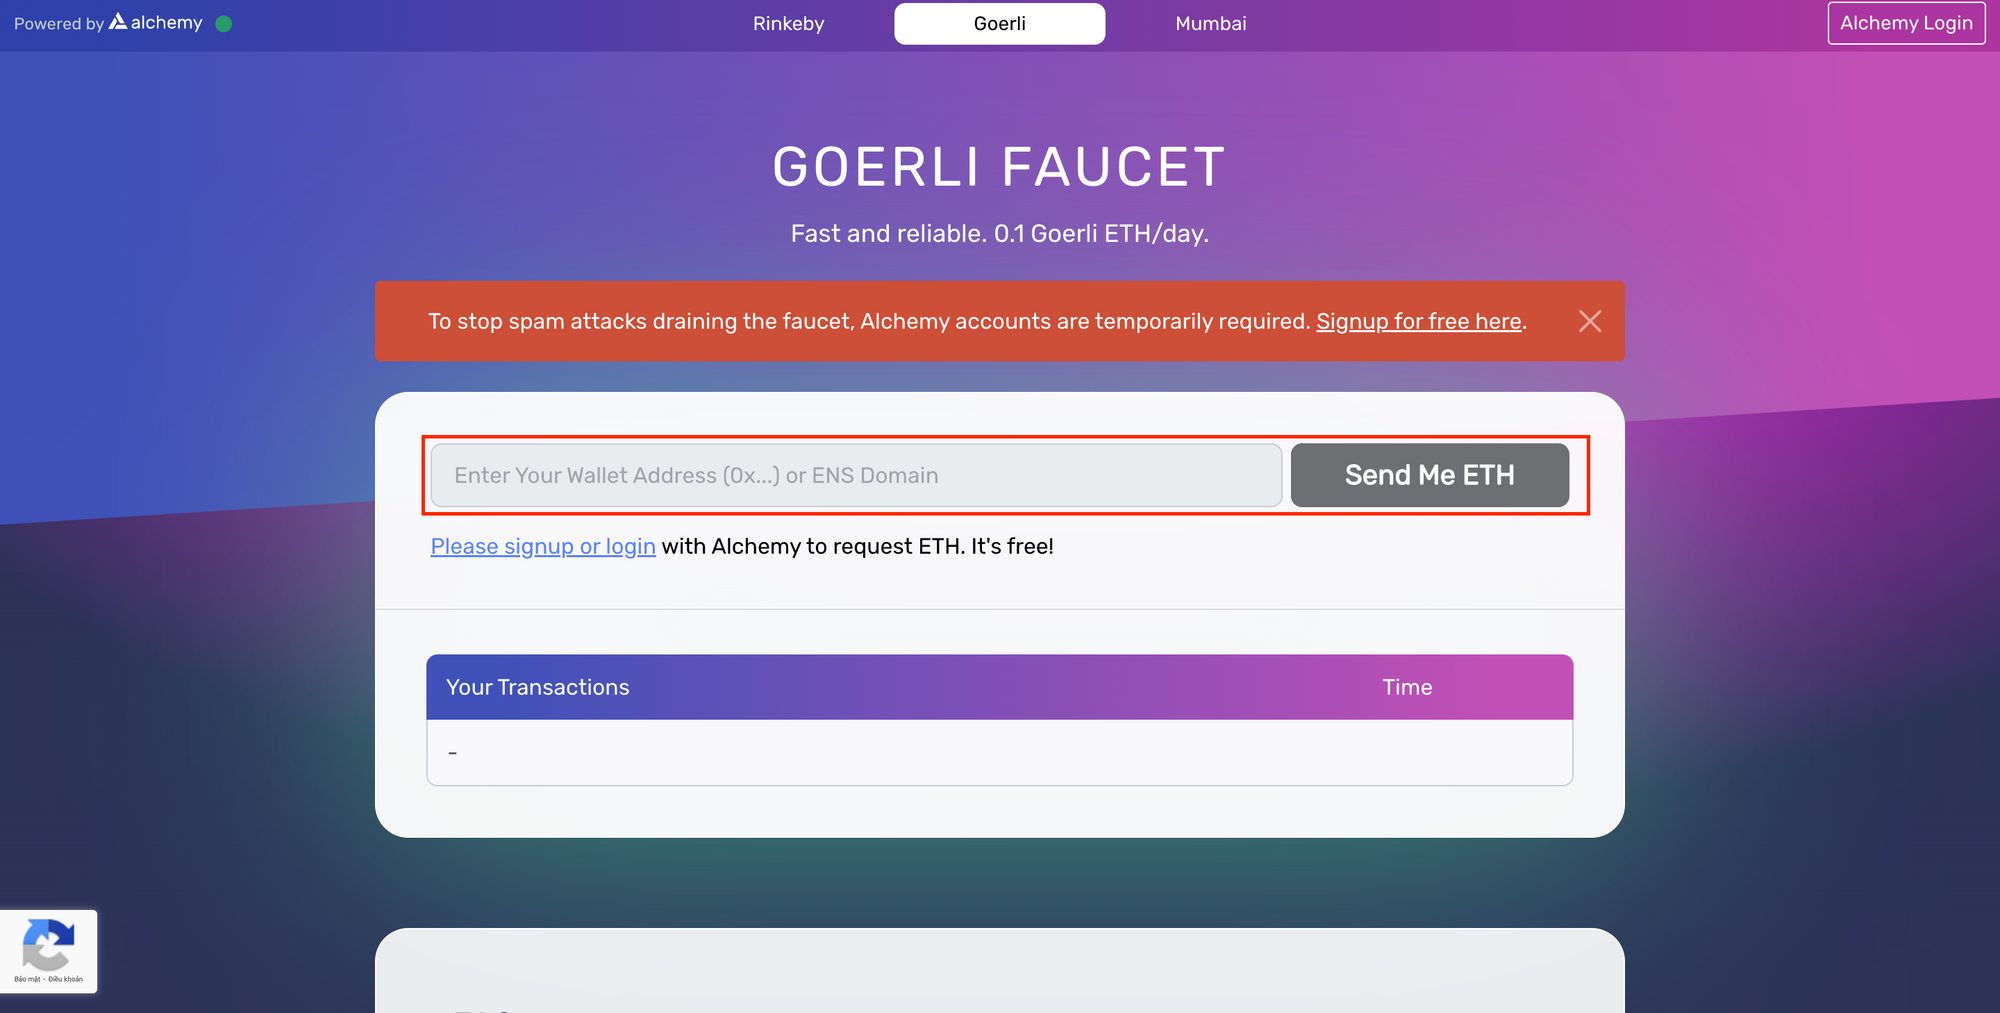
Enter your ETH wallet address in the box and press "Send Me ETH". Note: each wallet can only faucet 0.1 GoerliETH within 24 hours, you can faucet for many wallets and then transfer to one wallet if you want to faucet in bulk.
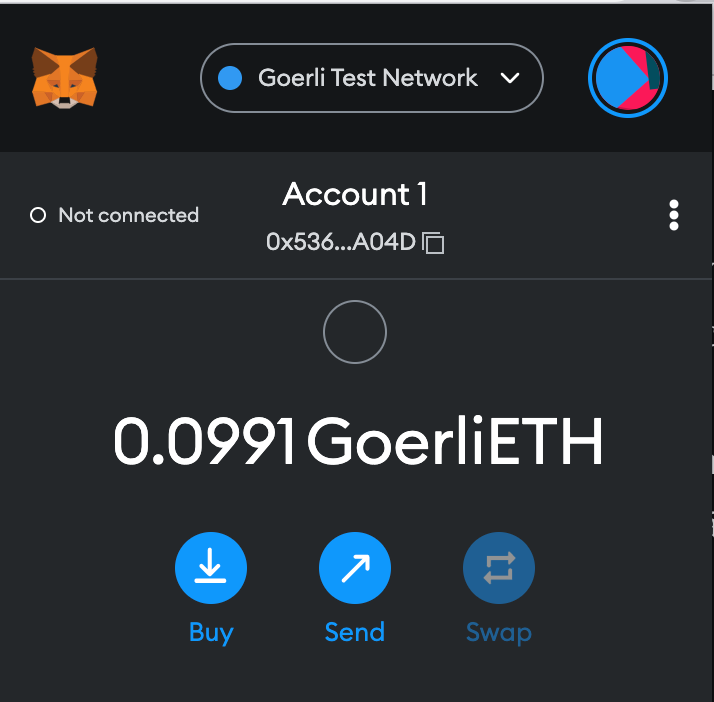
After your account has GoerliETH, we can access Primex again to faucet other tokens to perform platform functions here.
Step 3:
After connecting the wallet to the platform, the Ethereum Goerli Testnet will be added and the platform will ask you to change the active network, accept and continue.
Step 4:
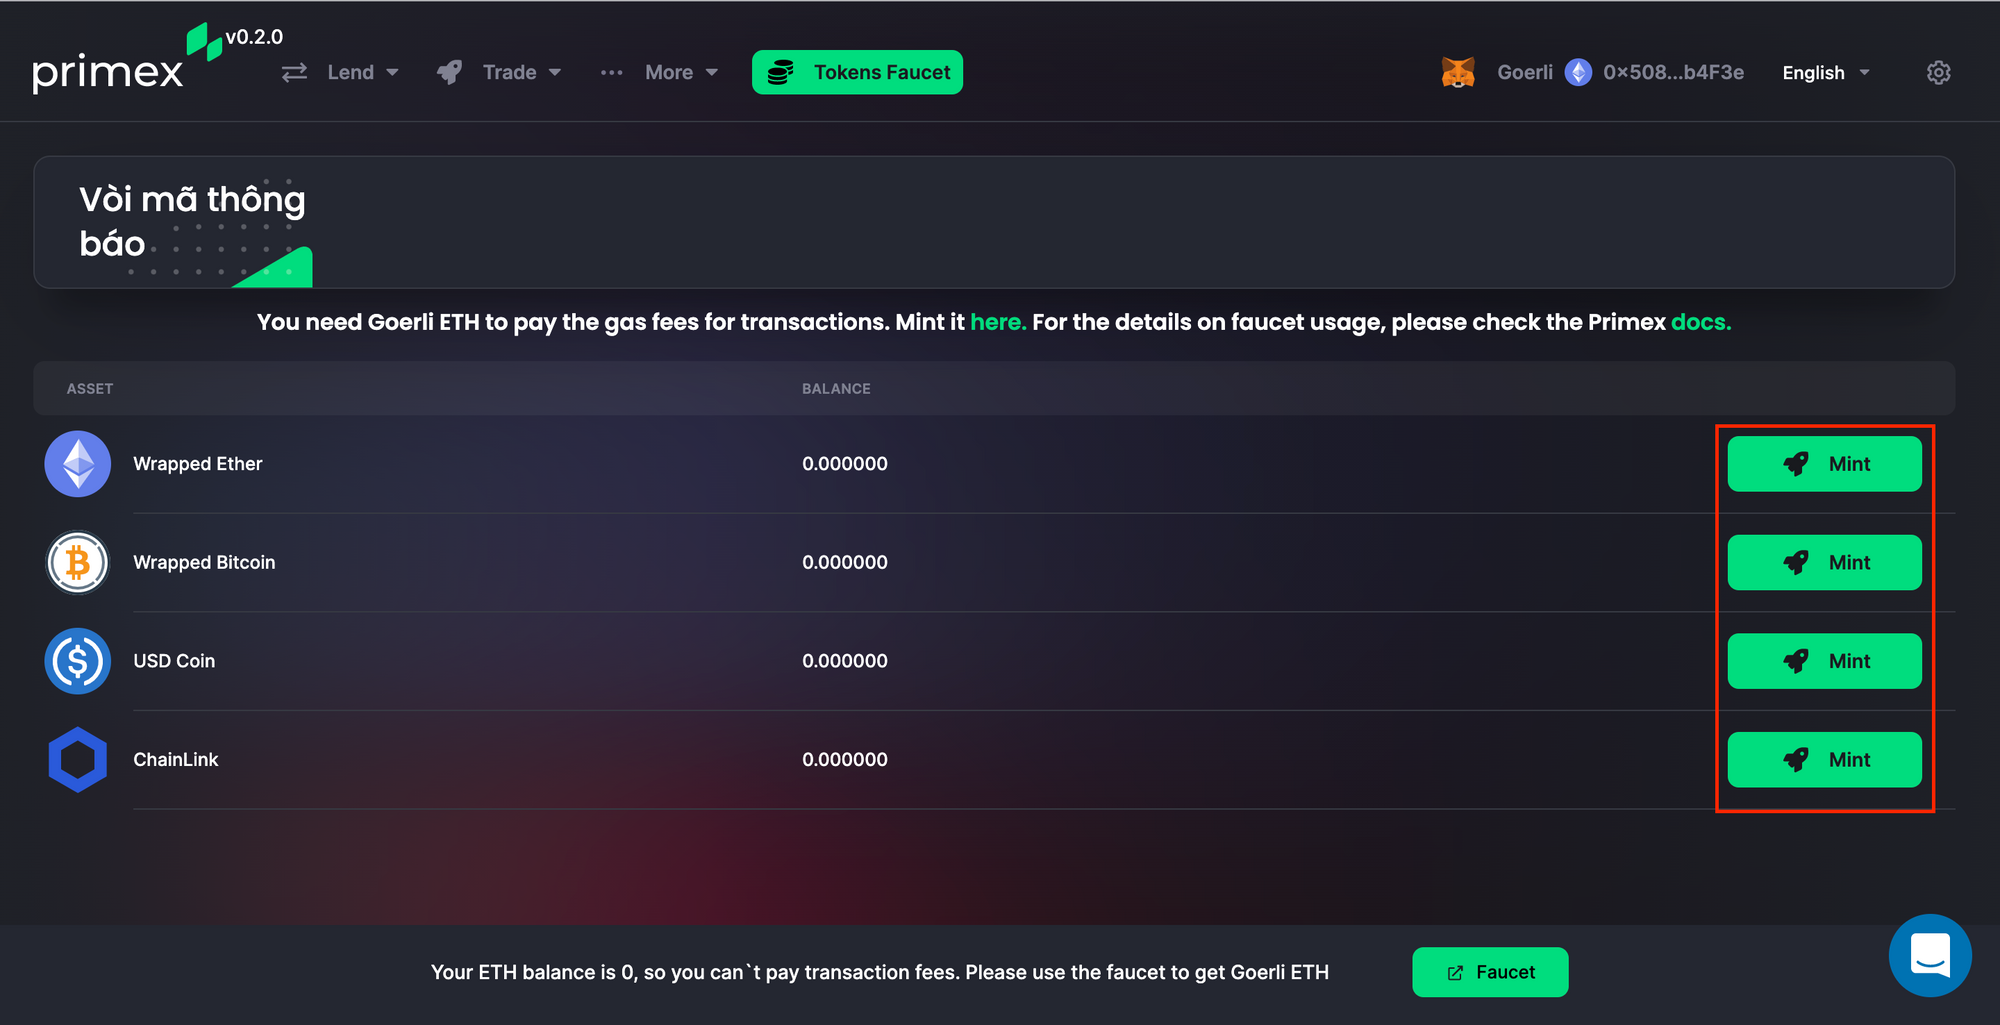
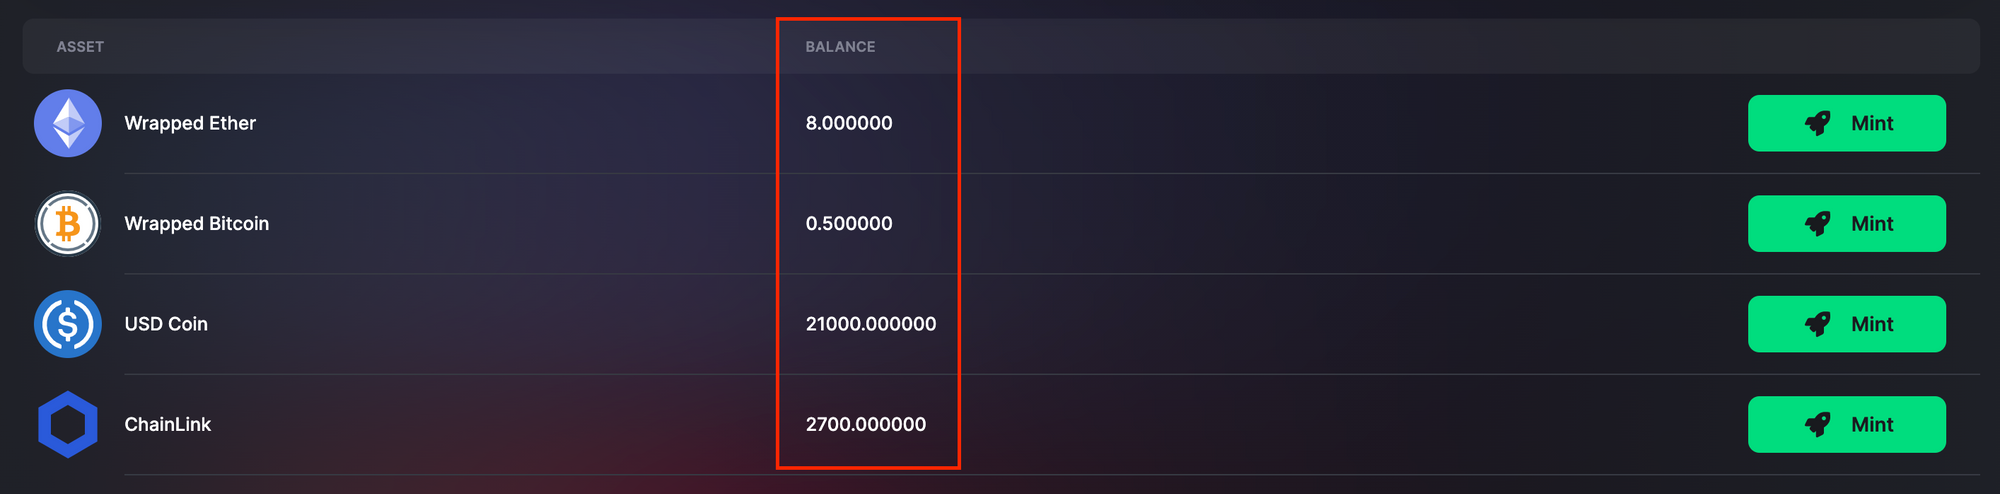
Select the appropriate asset, press "Mint" and accept the transaction, each asset can only be minted once within 24 hours. After the faucet is successful, we have assets to experience the two main features of the project: Lend and Trade.
Lend's feature
Step 1:
Click "Lend" in the corner of the screen and select "Buckets". Here we can deposit our assets into Credit Bucket to seek profit
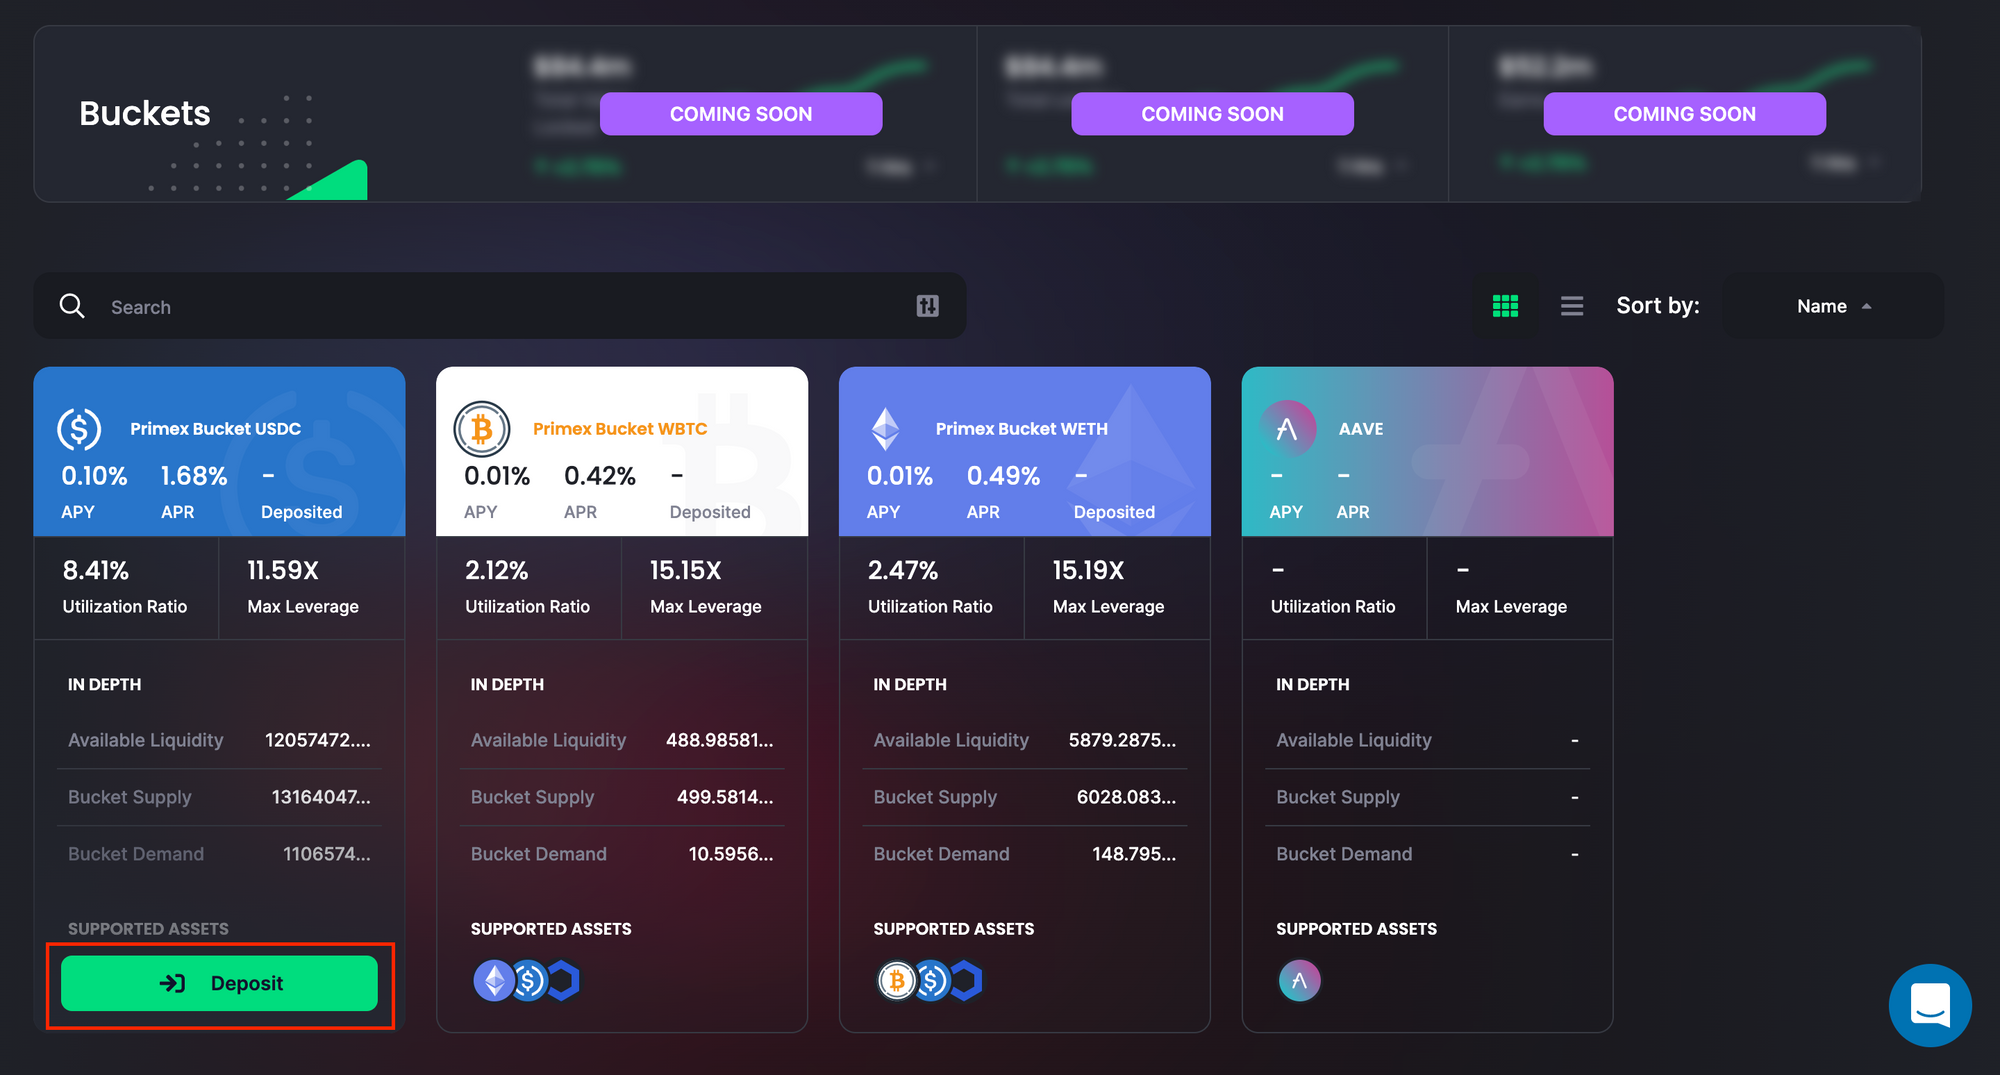
Each liquidity bucket will have information about interest rate, leverage, assets backed by liquidity bucket,...
Step 2:
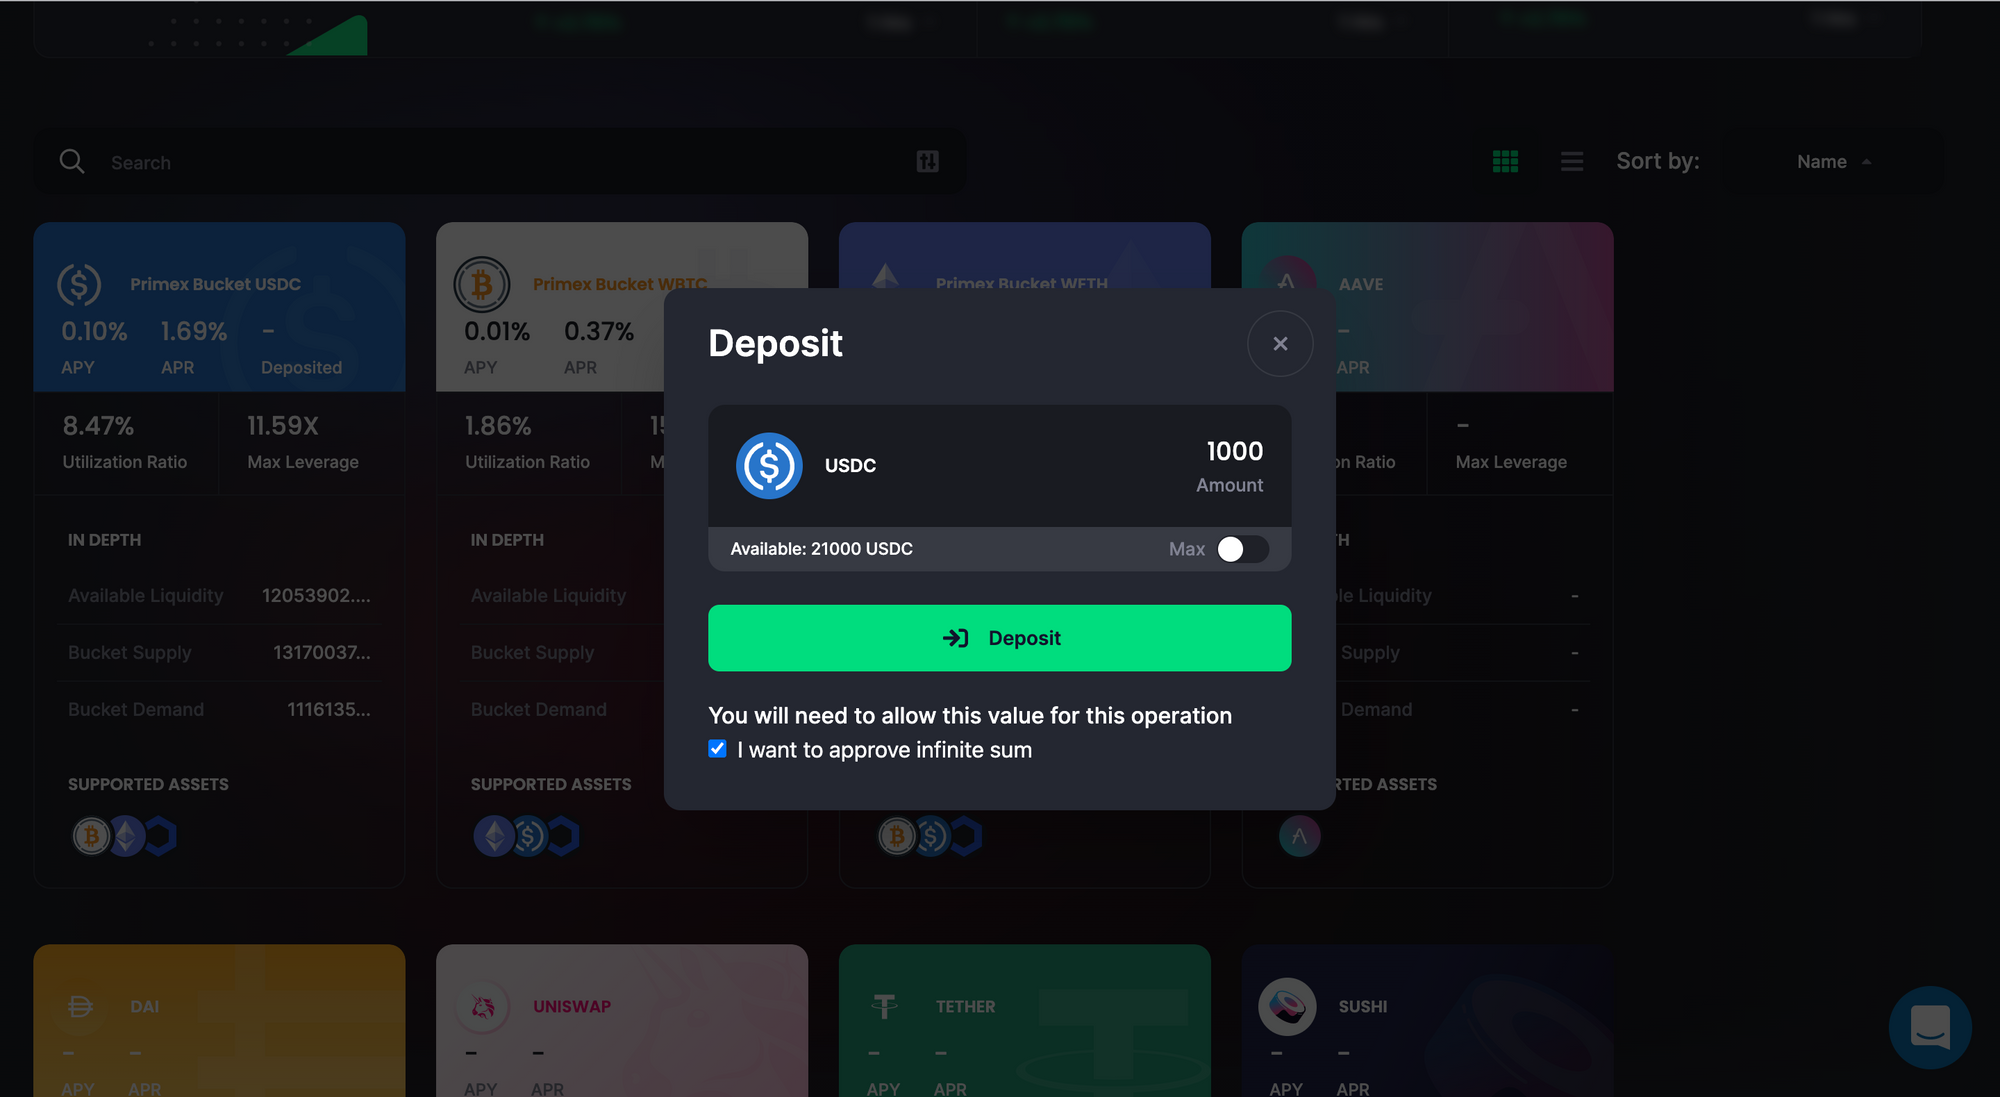
Depending on your needs, select the appropriate liquidity bucket and press "Deposit". Enter the number of tokens you want to deposit into the bucket and press "Deposit" again. Accept the transaction, wait a moment and you have successfully loaded into the liquidity bucket.
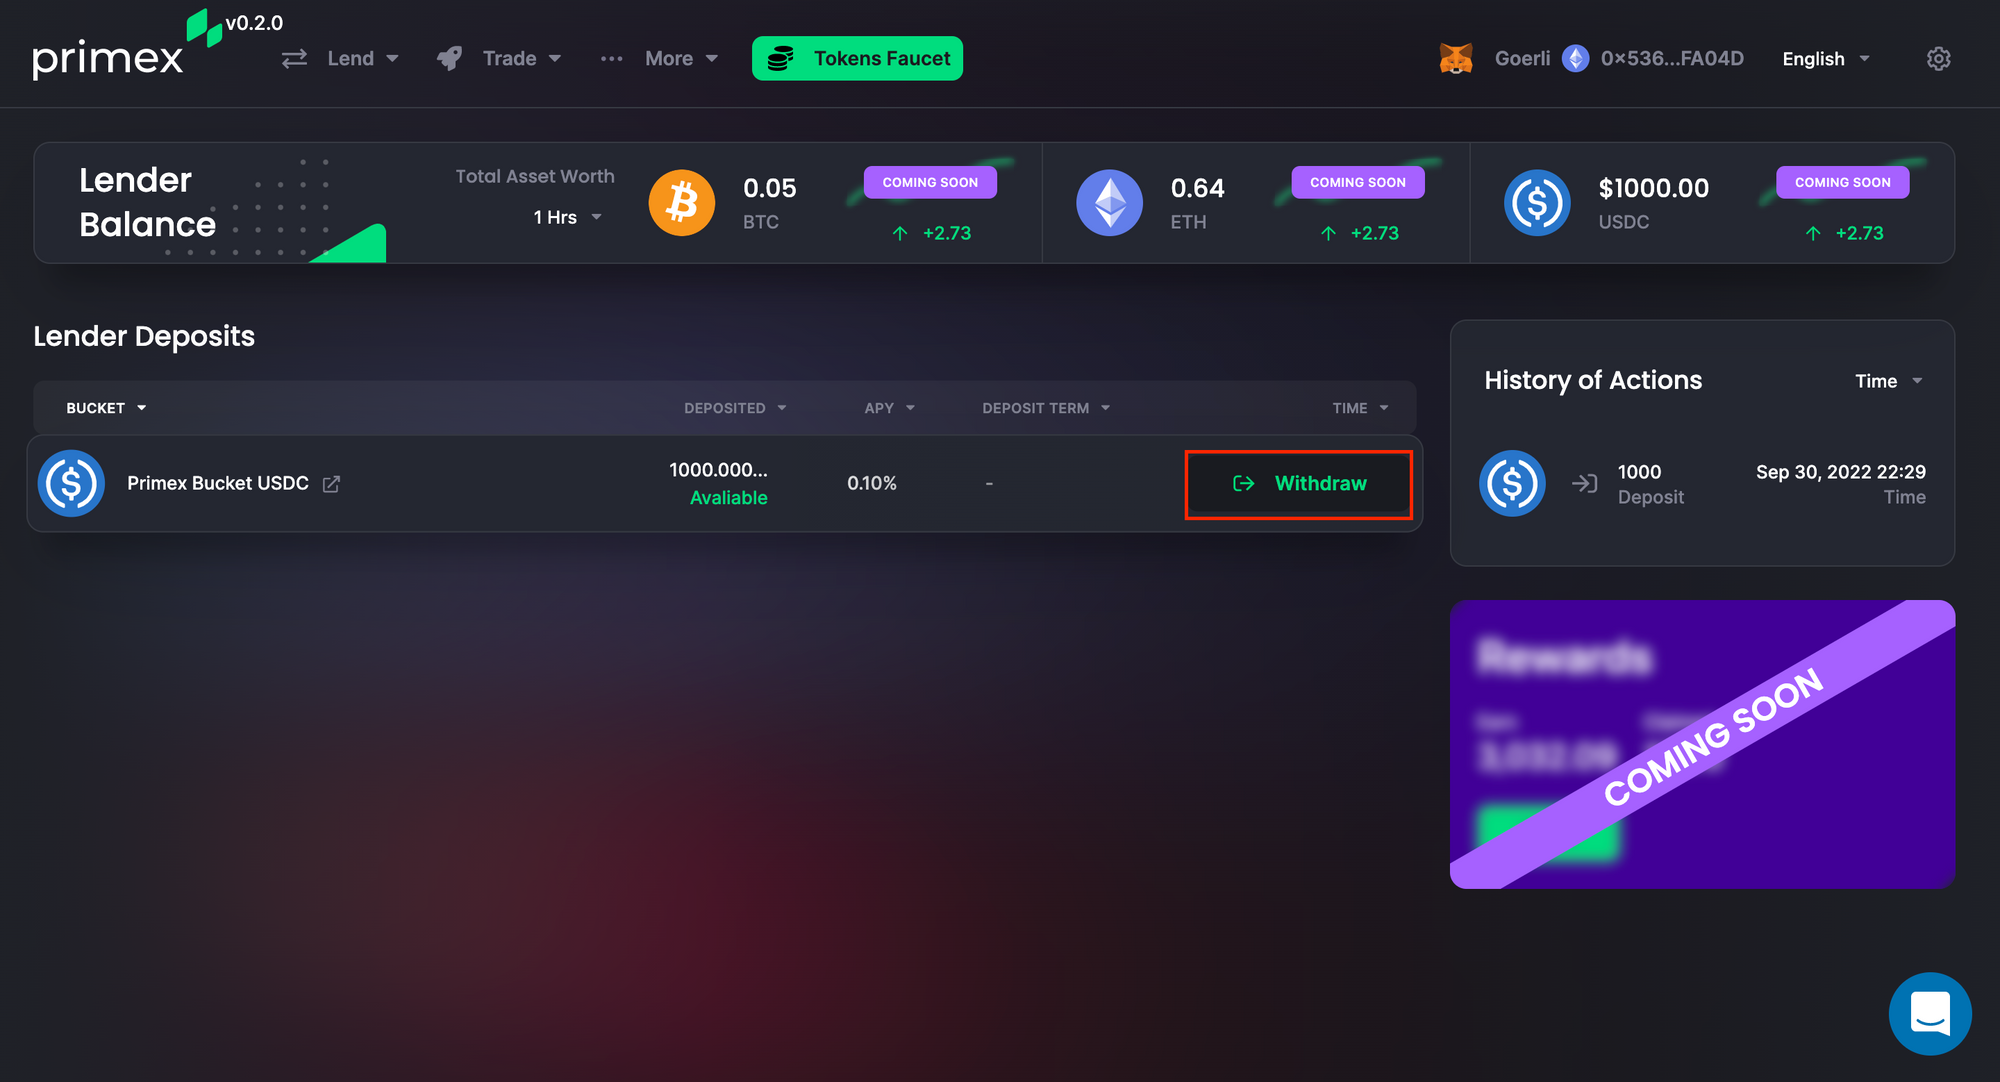
People can repeat with other liquidity buckets, or withdraw and refill, additional faucets to load into buckets to find bugs to help the project.
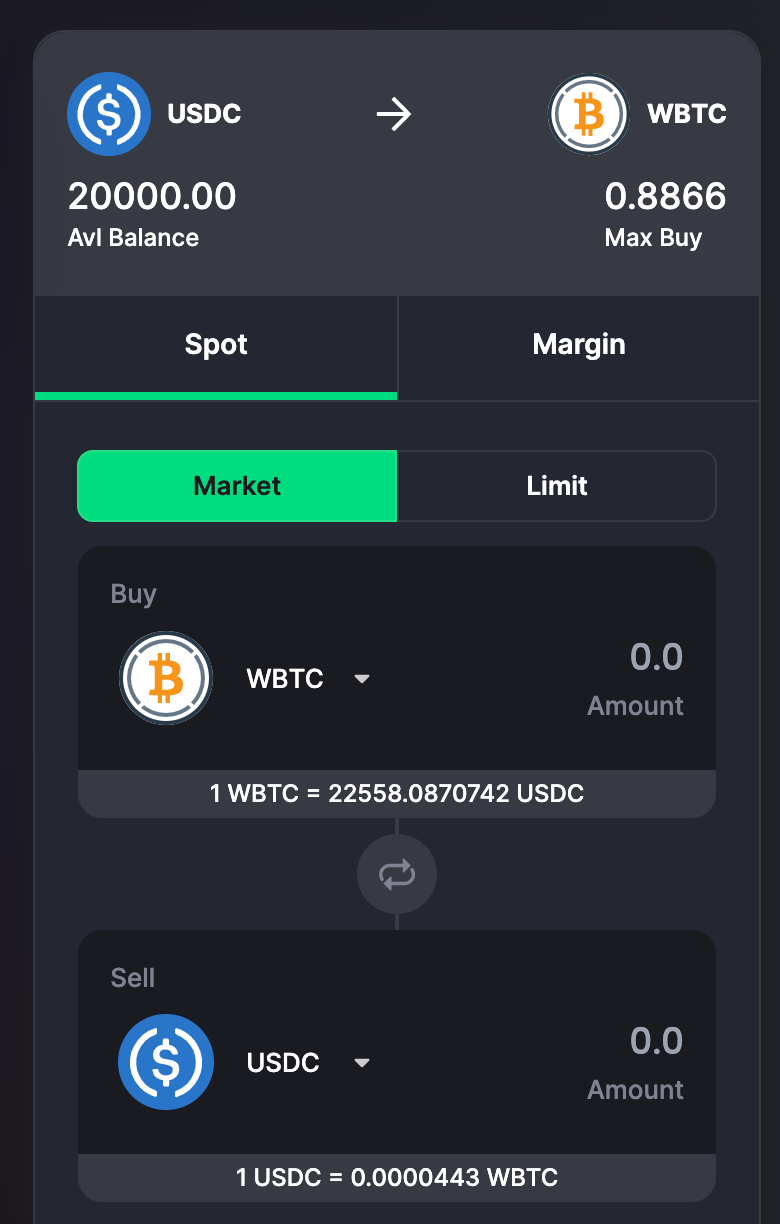
Trade feature
Step 1:
To experience the Trade feature, users switch to the 'Trade' section on the corner of the platform's web page and click on the 'Trading' section.

Step 2:
Users can choose between two types of trades as 'Spot' and 'Margin'. You also can choose between the 'Market' and 'Limit' commands. Next, select the type of crypto asset to buy and sell, and enters the quantity.
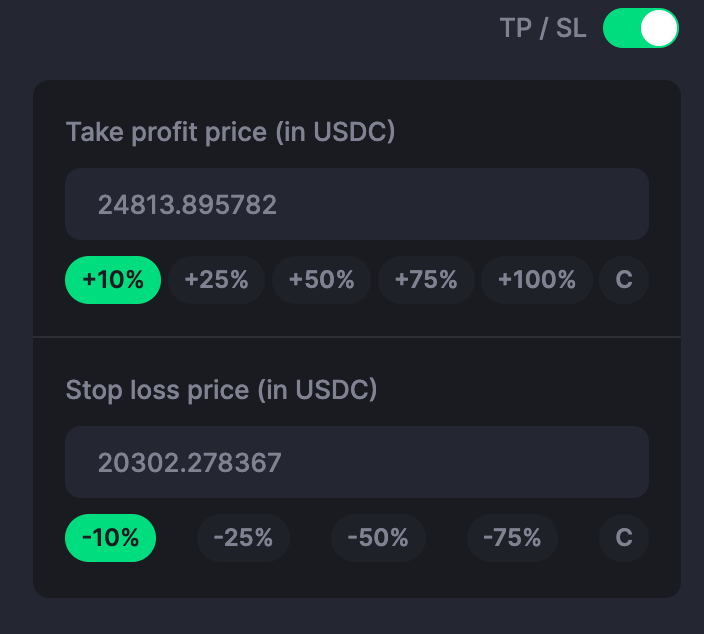
Step 3:
Then you have the option to enable or disable the TP/SL entry. If disable this option, you will have to trade manually if your position has a profit or a loss. Conversely, if the you turns on this feature, the platform will display as shown below, specifically:
- Take profit price : The position will close if the order reaches the desired rate or profit percentage
- Stop loss price : The position will close if the order reaches the rate or percentage to stop loss
Step 4:
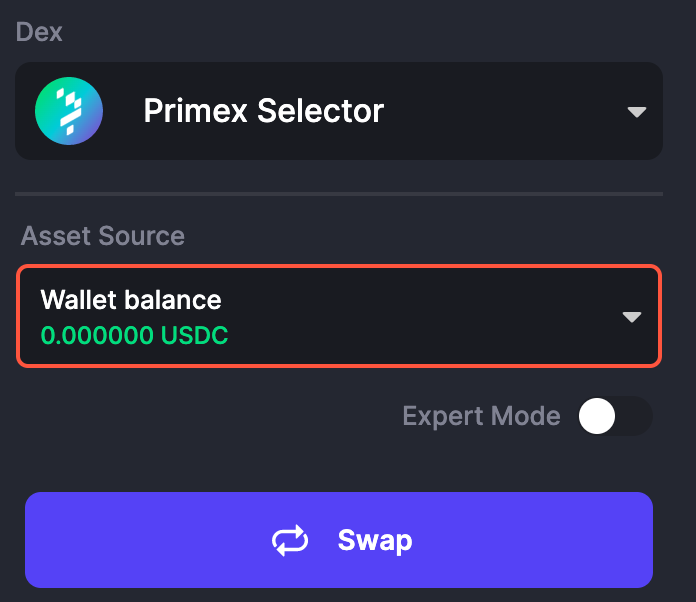
Next, select the DEX he wants to open a position in in the 'DEX' section. Currently in Beta, Primex supports 2 other DEX platforms, Curve and Balancer, and Uniswap V3.
Next, you will need to select the source of their crypto assets in the 'Asset Source' section to be able to proceed with the position opening. Finally, click on 'Swap' and selects 'Approve' on the wallet to complete the position opening on Primex.